Connecting a django project to an identity provider
In this tutorial, you will learn how to use this library along with an identity provider (IP) to setup a single-sign-on system. For the purpose of this tutorial, we will use Keycloak as an IP.
Requirements
To use this library, make sure that you meet the following requirements:
django>=4.2python>=3.8the Session middleware is enabled
a cache backend for django (redis, etc.)
an OIDC-compliant identity provider
Installation
To install this library the easiest way is to use the pypi package
pip install django-pyoidc
Configuring your SSO
Next, you should configure a client in your identity provider configuration interface.
Warning
Incorrect configuration of your Identity Provider can create security issues. Please make sure you understand the values you input and their impact on the security level of your system.
We provide instructions for Keycloak (version 18 and more), a free and open source Identity Provider maintained by Red Hat.
Keycloak
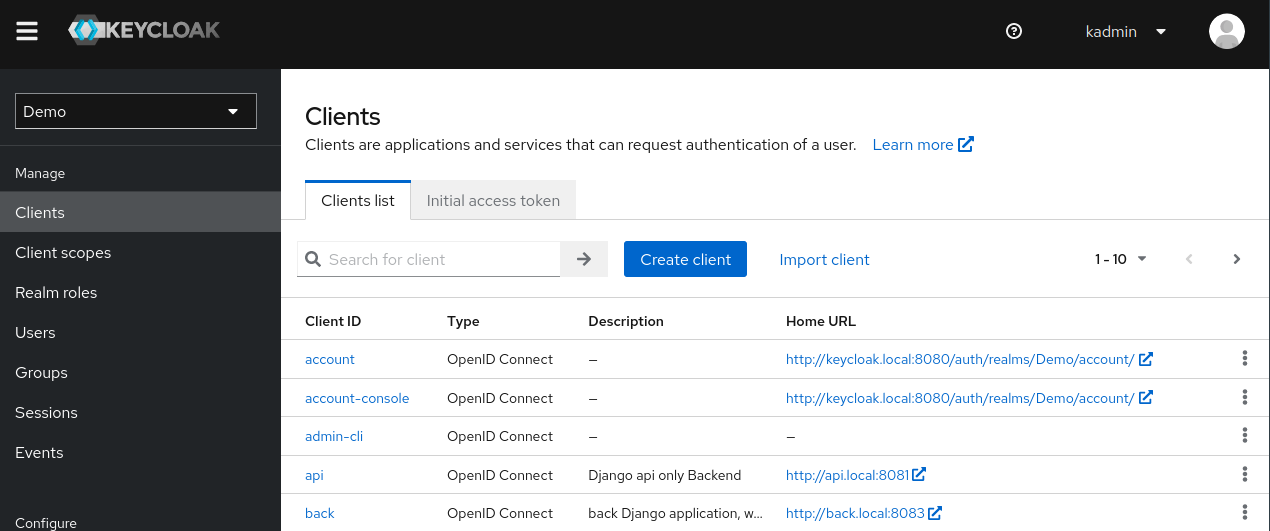
Start by connecting as your realm admin on the administration interface.
We will create a new client which supports the ‘Authorization Code Flow’. Go to the client list of your realm and click on “Create client”
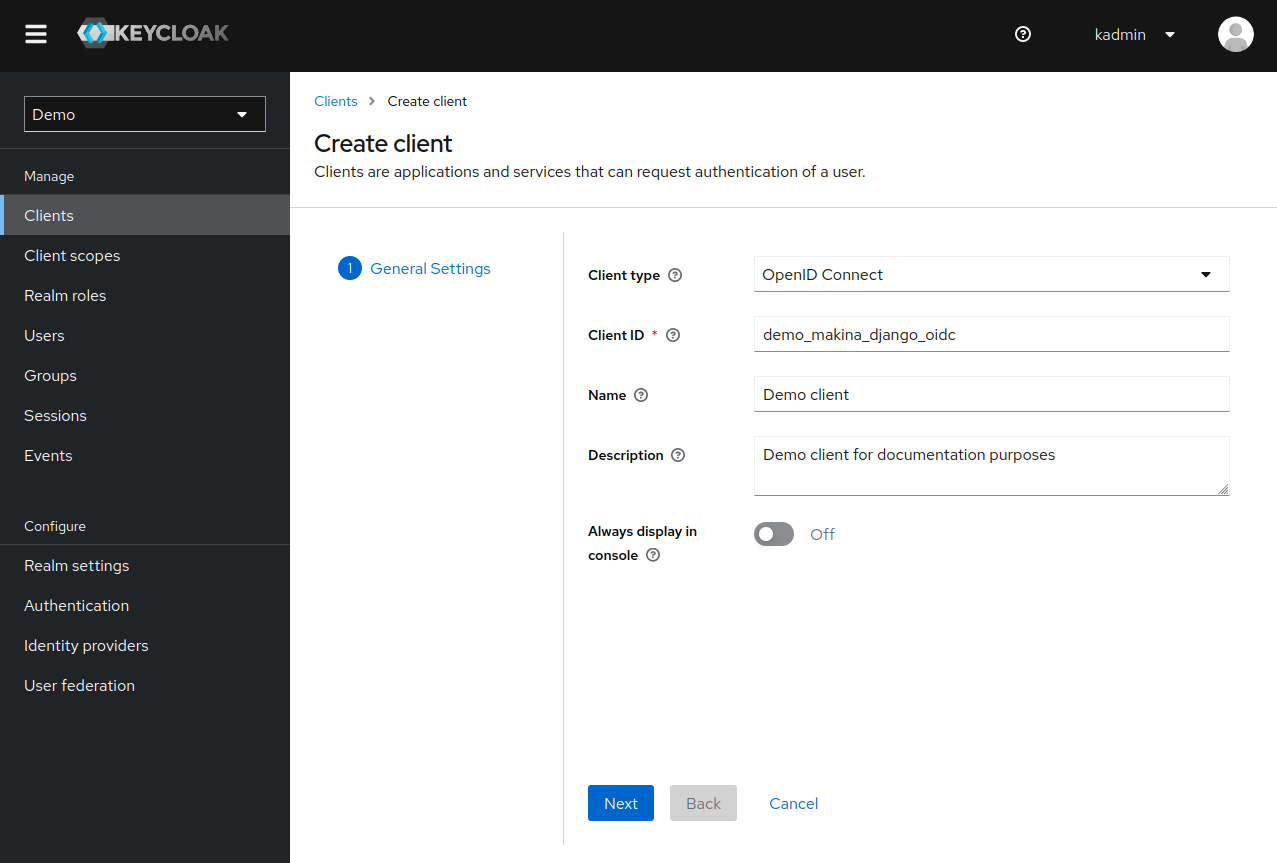
Set the Client type to OpenID Connect and choose a meaningful Client ID. The other options do not matter for this tutorial.
On the second page, enable Client authentication and the Standard Flow (also named Authorization Code Flow which is the one that we want).
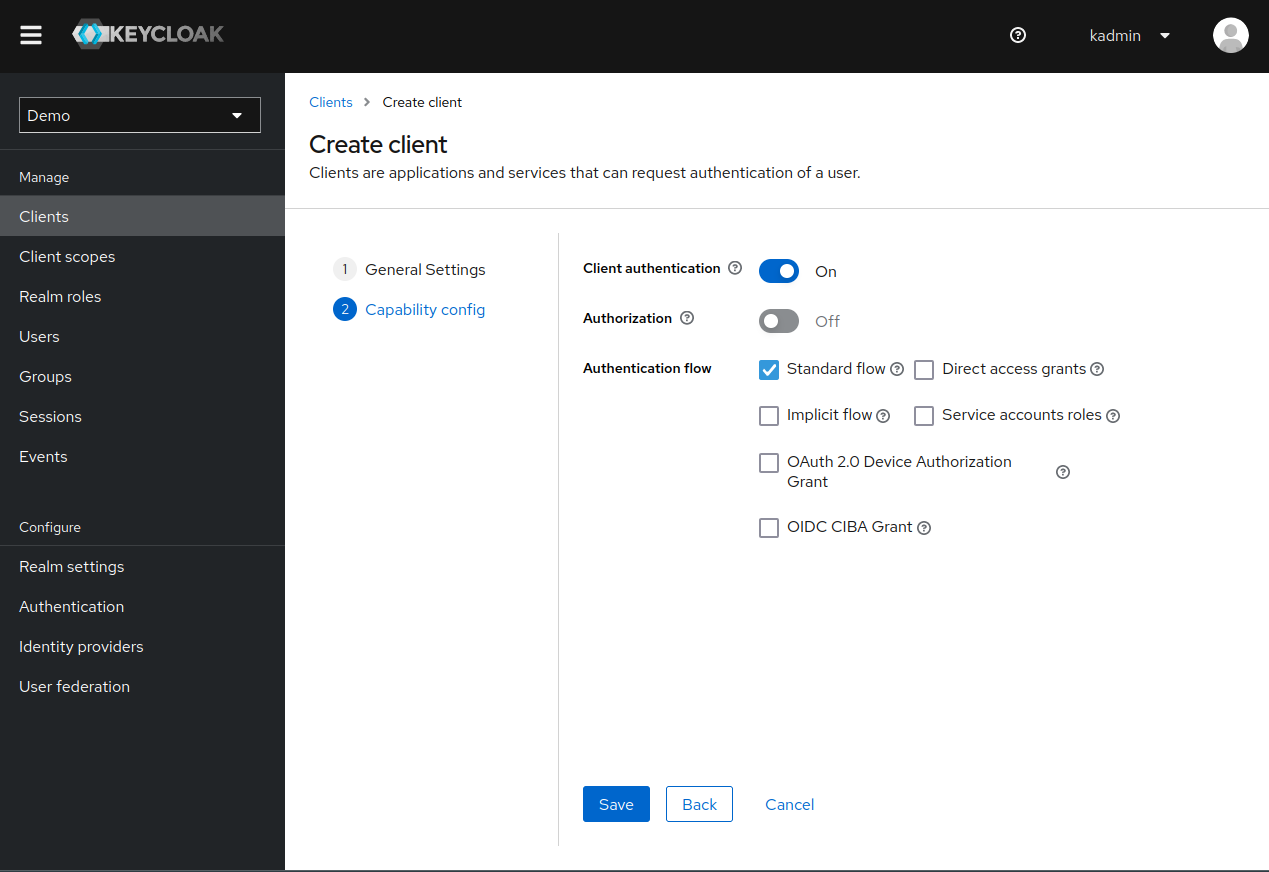
Click on save and your client should be visible in the client list.
You can now configure your URLs. In the following example, the Django application is hosted at app.local:8082.
We configure our client URLs as such:
Root URLandHome URLredirects to the root of our application http://app.local:8082With
Valid redirect URIswe allow the user to be redirected to our application, or the one listening onlocalhost:9091and127.0.0.1:9091(for debug purposes)With
Valid post logout redirect URIsthe user can be redirected to our application after logout: http://app.local:8082/*Web originsis set to + which allows (through CORS) all origins from the redirect URIs
TODO: using a 2nd app at localhost:9091 is confusing, remove that, use a localhost:something, better

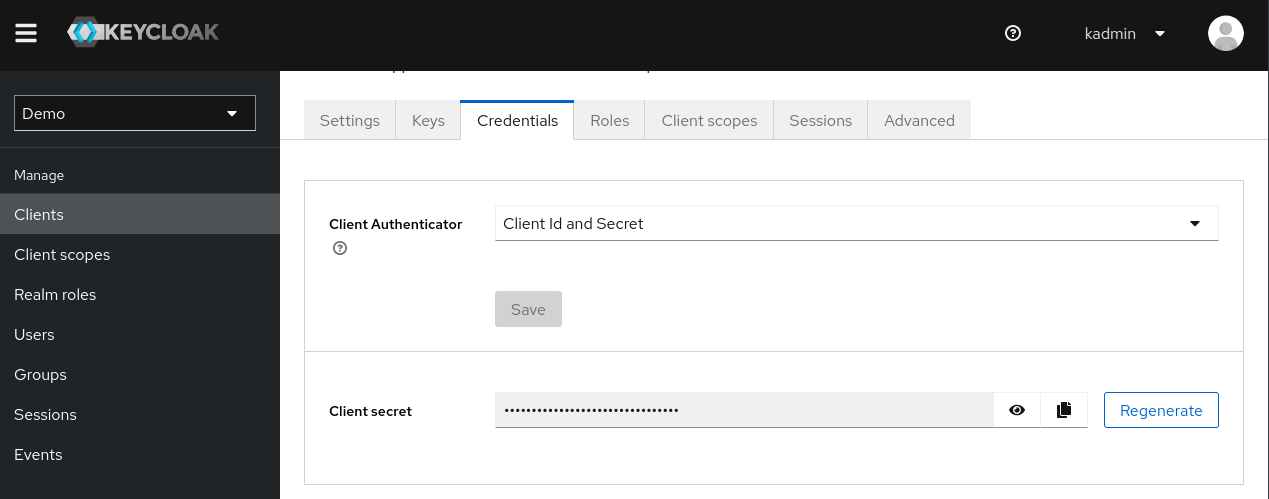
Take note of your Client ID and visit the Credentials Page to find your Client Secret. You will need both to configure the OIDC connector.
Finally, click on Realm Settings in the left menu, and scroll down to the Endpoints section. Copy the
OpenID Endpoint Configuration URL as you will need it later (this is the autodiscovery URL).
Congratulation, your Keycloak configuration is complete! 🎉
Other Identity provider
Configuring your Django project
Install the application
It is now time to configure your Django project.
First, add the library app (django_pyoidc) to your django applications, after django.contrib.sessions and django.contrib.auth:
INSTALLED_APPS = [
    "django.contrib.auth",
    "django.contrib.sessions",
    ...
    "django_pyoidc"
]
Warning
Do not forget later to run the migrations! This module requires some extra database storage tables.
Configure a cache backend
You must have a cache backend for this library to work! The OIDC protocol is very stateful and we use Django cache system to store data. If you want to understand why, you can read the Cache management page.
For the sake of this tutorial, you can use this cache management snippet (it should be pasted in your settings.py):
CACHES = {
    "default": {
        "BACKEND": "django.core.cache.backends.locmem.LocMemCache",
        "LOCATION": "unique-snowflake",
    }
}
Warning
Do not use those settings in production! Go read the django documentation for more details.
Configure the library
First, make sure that the Session middleware is enabled.
We will use django_pyoidc provider system to generate the library configuration and views.
When using provider, you must provide 4 settings:
the provider class to use
the OIDC client ID: this is your identifier on the IP side (this is not a user account, this must be a client in the OIDC terminology)
the OIDC client secret: this is your secret on the IP side
the OIDC discovery URL: this url allows us to discover the various endpoint of the identity provider, easing the configuration
You must also define a provider name that will be used with other classes from this library. In the following
example, we define a provider named sso which uses Keycloak18Provider and fetches it’s credential from
two environment variables:
DJANGO_PYOIDC = {
    # This is the name that your identity provider will have within the library
    "sso": {
        # change the following line to use your provider
        "provider_class": "django_pyoidc.providers.keycloak_18.Keycloak18Provider",

        # your secret should not be stored in settings.py, load them from an env variable
        "client_secret": os.getenv("SSO_CLIENT_SECRET"),
        "client_id": os.getenv("SSO_CLIENT_ID"),

        # Your autodiscovery url should go here
        "provider_discovery_uri": "https://keycloak.example.com/auth/realms/fixme",

        # This setting allow the library to cache the provider configuration auto-detected using
        # the `provider_discovery_uri` setting
        "oidc_cache_provider_metadata": True,
    },
When you need to configure a setting for your identity provider, it means that you have to update the dictionary in this setting. For example, if you were to configure oidc_paths_prefix for your Keycloak provider, you would add oidc_paths_prefix : <your value> to the sso dictionary.
Please note that drf is a reserved provider name (see Configuring django_rest_framework for more details)
Copy-paste this snippet to your settings.py. Make sure to modify provider_discovery_uri.
Generate the URLs
We provide a facility that generates all the views needed for a provider. This is implemented by the
OIDCHelper class. This class reads the DJANGO_PYOIDC setting and uses it’s configuration to
generate views.
To use it, you must instantiate it with op_name=<the name of your identity provider>.
Here is how to do it for our tutorial:
from django_pyoidc.helper import OIDCHelper

# `op_name` must be the name of your identity provider as used in the `DJANGO_PYOIDC` setting
oidc_helper = OIDCHelper(op_name="sso")

urlpatterns = [
    path(
        "auth/",
        include((oidc_helper.get_urlpatterns(), "django_pyoidc"), namespace="auth"),
    ),
]
This will create 4 views in your URL configuration. They all have a name that derives from the op_name that you used to create your provider.
a
login viewnamed<op_name>-login, here handled on the/auth/loginpatha
logout viewnamed<op_name>-logout, here handled on the/auth/logoutpatha
callback viewnamed<op_name>-callback, here handled on the/auth/callbackpatha
backchannel logout viewnamed<op_name>-backchannel-logout, here handled on the/auth/backchannel-logoutpath
Tip
You can override the naming behavior by configuring the setting oidc_paths_prefix of your
identity provider. The view names would then be <oidc_paths_prefix>_<view_name>.
You should now be able to use the view names from this library to redirect the user to a login/logout page.
Configuring django_rest_framework
When using OIDC to authenticate an API, things are a little bit different than on a full stack website:
we do not want to redirect users on login pages, or to manage logout
we are receiving OIDC Bearer tokens – access tokens– (generated from other clients of the SSO) and the task is mainly to check that this token is valid and extract the user from it.
To configure django_rest_framework, you must create a special provider named drf. The configuration
is similar to the one made in Configure the library.
DJANGO_PYOIDC = {
    # This is the name that your identity provider will have within the library
    "drf": {
        "provider_class": "django_pyoidc.providers.keycloak_18.Keycloak18Provider",
        "client_secret": os.getenv("SSO_CLIENT_SECRET"),
        "client_id": os.getenv("SSO_CLIENT_ID"),
        "provider_discovery_uri": os.getenv(
            "SSO_ENDPOINT", "https://keycloak.example.com/auth/realms/fixme"
        ),
        "oidc_cache_provider_metadata": True,
    },
Note
Usually your application should request a different client_id for the apimode (like a my-app-full client_id for a confidential classical OIDC client and a my-app-api client_id for a bearer-only OIDC client in Keycloak). But if you have only one client_id it’s OK to simply make a copy for the settings.
Once you declared those settings, you can configure DEFAULT_AUTHENTICATION_CLASSES to use django_pyoidc.drf.authentication.OIDCBearerAuthentication to use this authentication class on all your views:
REST_FRAMEWORK = {
    "DEFAULT_AUTHENTICATION_CLASSES": [
        "django_pyoidc.drf.authentication.OIDCBearerAuthentication"
    ]
}
You can also set this class on a per-view basis using the authentication_classes attribute:
from django_pyoidc.drf.authentication import OIDCBearerAuthentication

class ExampleViewSet(ModelViewSet):
    authentication_classes = [OIDCBearerAuthentication]
This class looks up the OIDC provider named drf in the DJANGO_PYOIDC setting. As such, you can only have one provider for all your API authentication, as you can not define
two drf keys in the settings.
Tip
Look up the drf documentation for more details about authentication classes.
Tip
Taking a look at the documentation of use_introspection_on_access_tokens might be a good idea if you run into some issues